Floor tiles should always be laid by a professional tiler who can guarantee optimal workmanship and finish. The following description, which is by no means exhaustive, describes the work, techniques and tools used by installers, allowing you to understand and appreciate the most significant aspects of this trade, which is so crucial to the success of the flooring.
To consult the health and safety regulations, please download and read the following document:
Health and safety documentation
Summary of our special feature on laying tiles:
- How to lay tiles? (coming soon)
- How to lay floor tiles?
- How to lay wall tiles? (coming soon)
- How to lay outdoor flooring?
- How to lay tiles on an existing ceramic floor?
1) INTRODUCTION: laying tiles
2) EQUIPMENT for laying tiles
3) CRITERIA for optimising the laying plan
4) GLUING the tiles
5) CUTTING the tiles
6) GROUTING
7) CLEANING tiles after laying
1) INTRODUCTION: laying tiles

Before laying, it is essential to check that the tone, size and choice of tiles are the same for all boxes. This information is indicated on the packaging and, if these values differ from one box to another, this could have negative consequences on the final appearance of the floor, with variations in tone and uneven joint widths. Furthermore, for best results, it is advisable to open several boxes at the same time and mix tiles from different boxes.
Certain rules must be followed to avoid unpleasant surprises.
First of all, the choice of tiles must be appropriate for the intended environment. We will mainly take into account:
- Location: outdoor/indoor (frost resistance-slip resistance)
- Intended use: bathroom/
It is then necessary to study the laying pattern, trying it out first on a dry basis to calculate waste, positioning of cuts, any expansion joints, joint size, etc.
Generally, the calculation is as follows:
- For straight joint installation, add 5-7% to the surface area to be laid.
- For staggered joint installation, add approximately 10-12%.
- For diagonal joint installation, add 15%.
Once the above steps have been completed, let’s see how we would proceed if we were to lay natural porcelain stoneware tiles in a 45×45 format with straight joints in a 5×5 m square living room, using adhesive on a ready-made and levelled screed.
2) EQUIPMENT for laying
- Class C1 or C2 adhesive (preferable) for porcelain stoneware, considering a consumption of approximately 2.5 – 5 kg/m² and a thickness between 2 and 5 mm
- Spatula for spreading the adhesive with 5-10 mm teeth
- Grout spacers of the desired size (generally 3-5 mm)
- Spirit level for checking flatness
- 2 m straight edge to check for unevenness
- Rubber hammer (if necessary to tap tiles)
- Tiles 25 m² + 7% waste + 5% reserve = approx. 28 m²
- Tile cutter of suitable size and good quality
- Tile nippers
- Possibly an electric grinder (the so-called ‘flexible’)
3) CRITERIA FOR OPTIMISING THE LAYING PLAN
To achieve a good result when laying tiles, it is important to pay attention to a few fundamental aspects:
- The joints must be as uniform as possible across the entire surface
- The fundamental reference line for the layout of the joints is the main axis of the room; in our case, it is the line perpendicular to the main entrance
- In the most visible areas, avoid cuts, discontinuities, etc.
- Avoid cuts that are too small in relation to the size of the tile (the ideal cut is about half a tile).
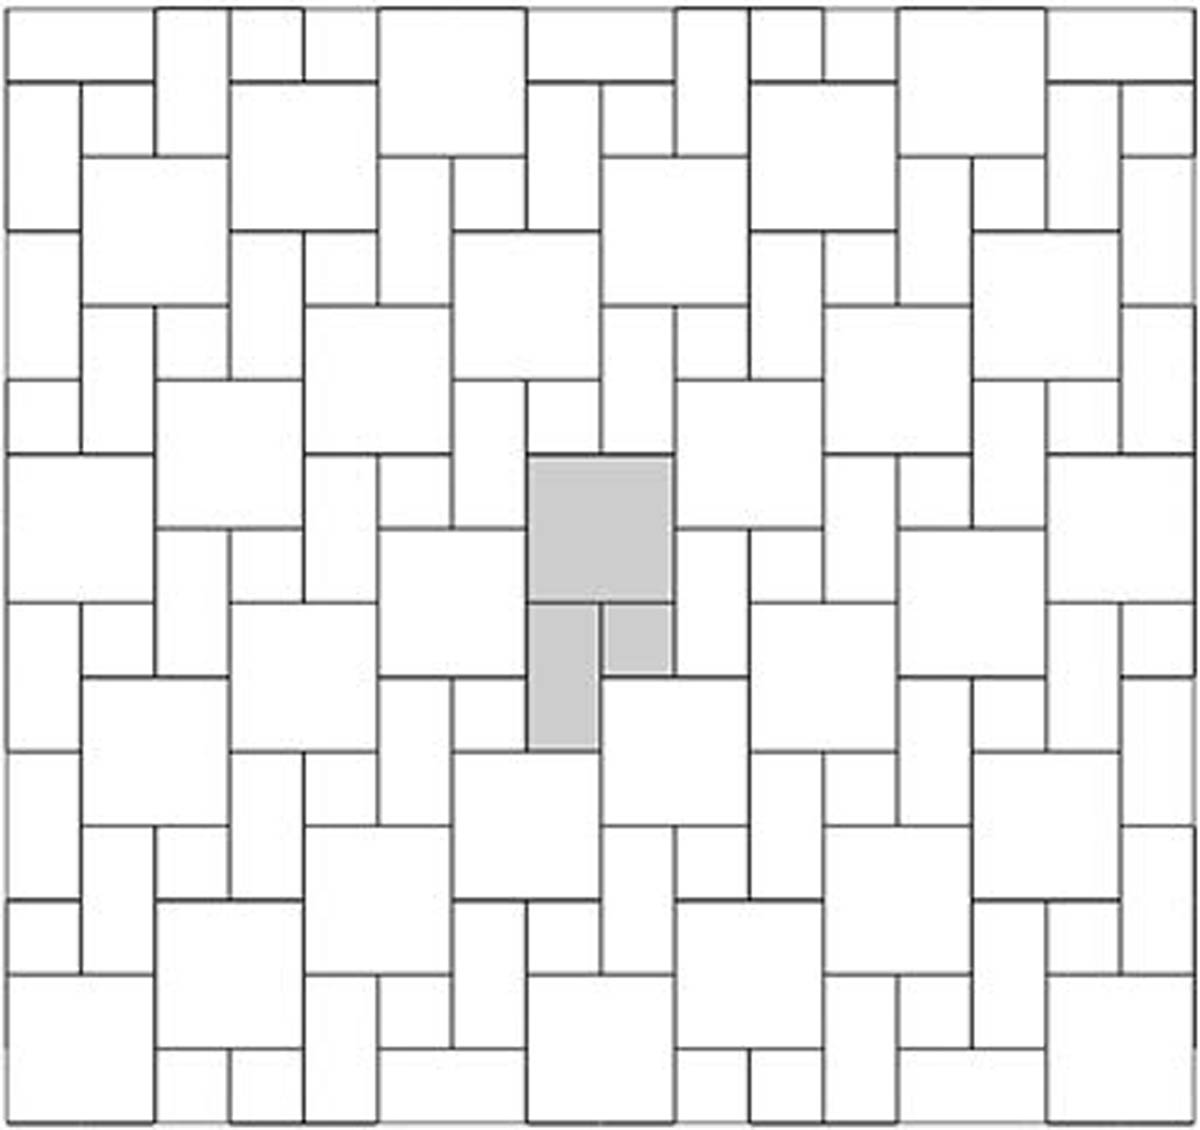
In our case (see drawing), the reference lines for laying the tiles are:
- direction parallel to the RS wall with the door
- direction perpendicular to the wall
You can start with a tile in the centre of the room and continue towards the opposite wall along the line, distributing the cuts across the walls.
You can also, more simply, start from the door with whole tiles and place all the cuts on the opposite wall and on the side walls, but the result will be less balanced.
4) Gluing the tiles
After thoroughly cleaning the laying surface, the installer will apply the adhesive with a trowel at a slight angle to achieve the required thickness, using circular movements and taking care to create a full and uniform bed: any empty space remaining under the tiled surface would constitute a weak point that would be subject to breakage even after the fall of a small object. The teeth of the trowel are used precisely to ensure a uniform level when spreading the adhesive.
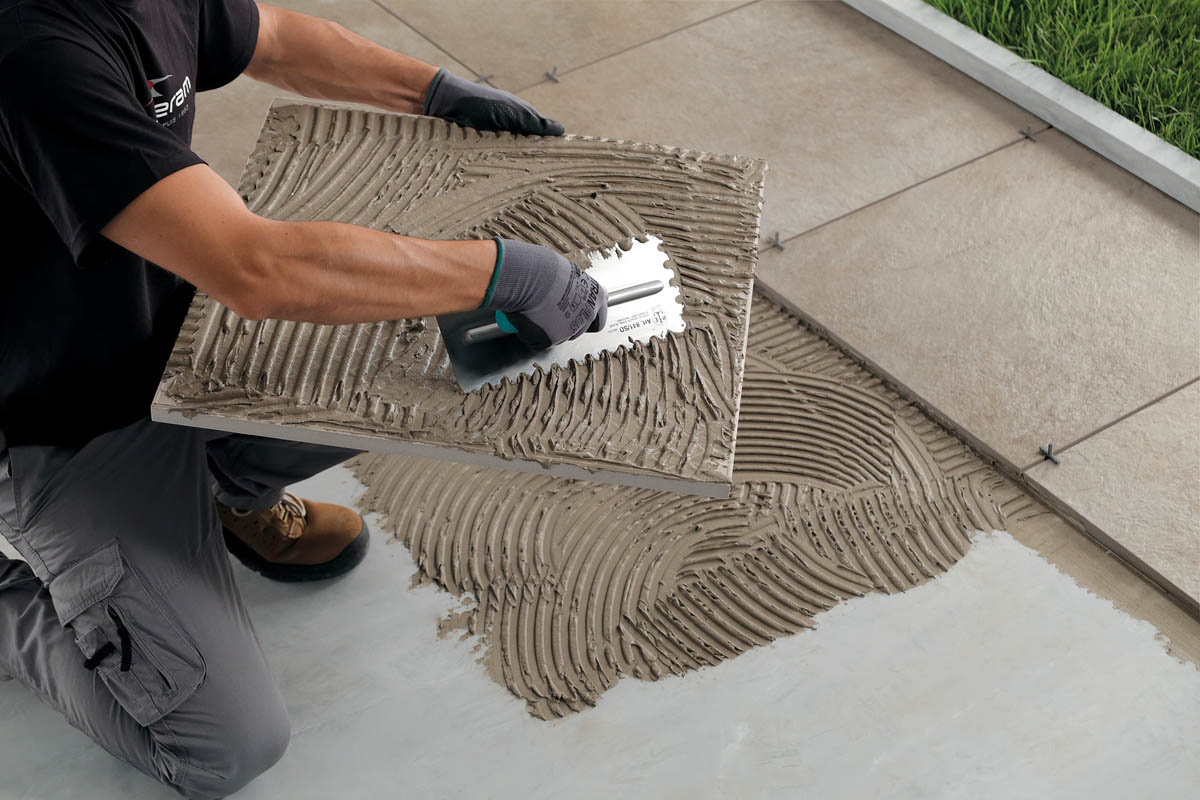
The tiler will begin by spreading the adhesive over an area of approximately 1m2 at a time: it is essential to lay the tiles before the adhesive begins to dry.
They will then lay the tile, taking care to tap it to even out the layer of adhesive, and continue according to the laying pattern, using spacers for the joints and checking the level.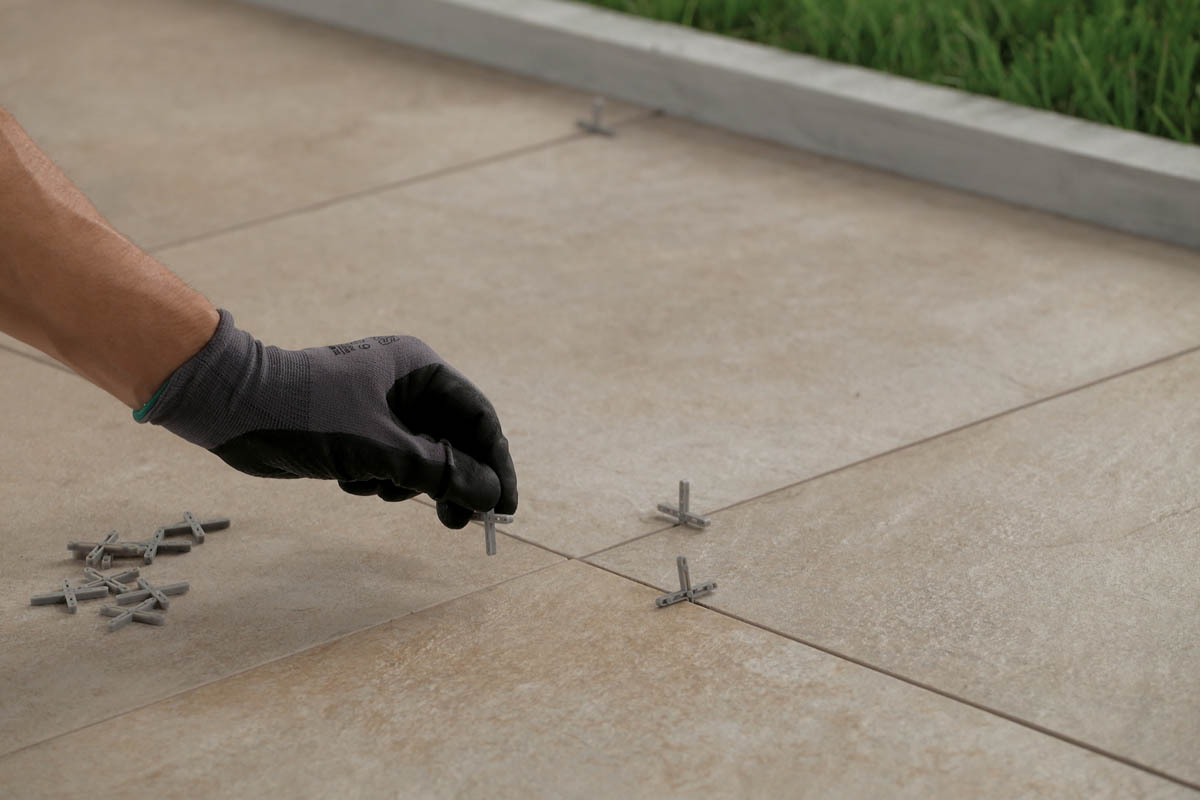
If one corner is lower than the adjacent ones, the installer can temporarily lift the newly laid tile and add a little adhesive until the correct level is reached (technically referred to as “loading” the tile’).
It is advisable to immediately remove any adhesive residue with a wet sponge that may soil the surface of the tile, as once dry, it is very difficult to remove.
5) CUTS
You will probably be surprised at how easily the tiler makes the cuts necessary to adapt the tiles to the shape of the room: the simplicity is only apparent and, if you were to try it yourself, you would immediately realise how difficult it is to achieve satisfactory cuts.
The best results are obtained by trying to apply constant but not excessive pressure on the cutting carriage, pulling (or pushing, depending on the model of tile cutter) it at a constant speed (neither too slow nor too fast: just enough to maintain momentum along the entire length). The critical points are the beginning and end of the cut.
If you need to cut an internal corner of the tile (for example, at a door), you can use the flexible blade. Some tilers cut both sides of the corner with the tile cutter and then break it with pliers.
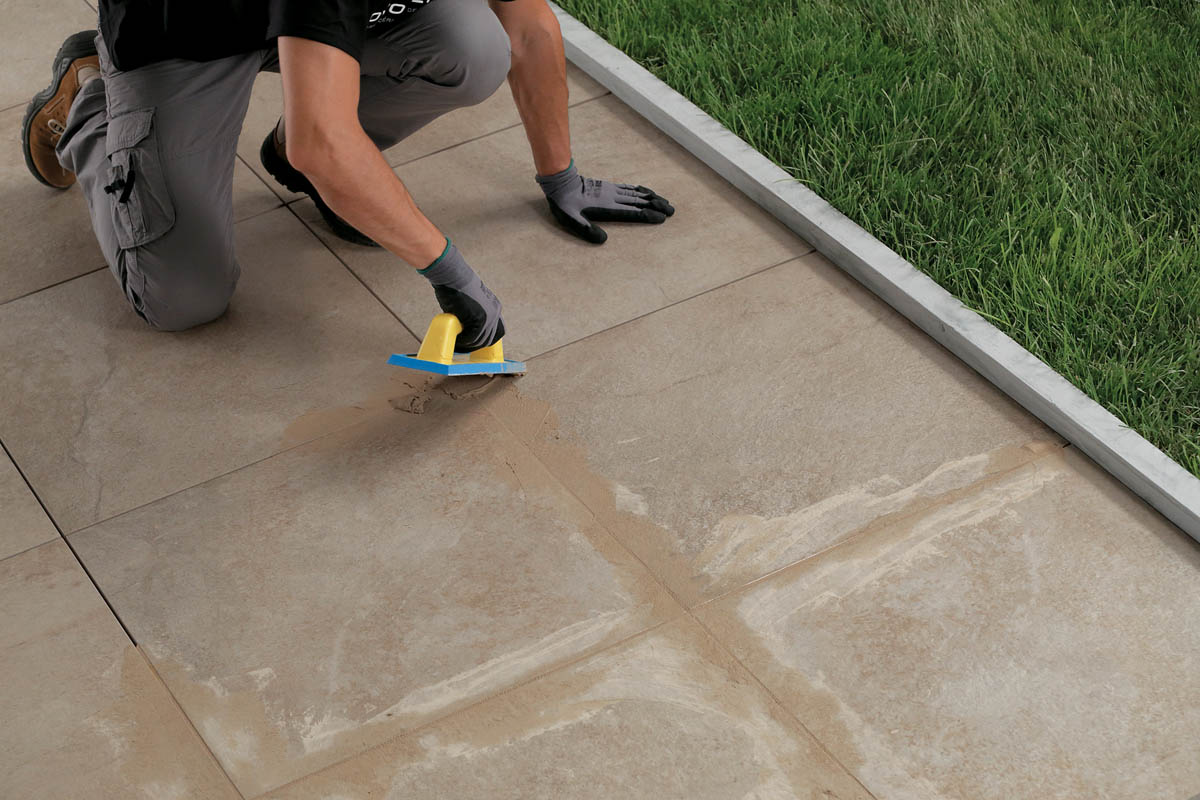
6) GROUTING
Once the tiles have been laid, wait for the adhesive to harden and then fill the joints with the grout chosen according to colour and requirements.
In our case, a cementitious grout is more than sufficient for the intended use.
Apply it evenly to the surface of the covering with a hard rubber trowel and then seal the joints until they are completely filled, working diagonally to the tiles. The installer must immediately remove most of the grout residue with the trowel, leaving only a thin film on the tile, and begin cleaning the covering after about 15 minutes when the grout is still fresh. For the final cleaning of the surface, use a thick, large sponge moistened with clean water or the appropriate tool to avoid digging into the joints.
7) CLEANING the tiles after laying
It is essential that, after the grout has set, the installer carries out a thorough acid-based cleaning to remove any limescale residues from the installation, using the products recommended by the suppliers and taking care to rinse the floor with plenty of clean water after each acid wash. For more detailed information
information on cleaning and maintaining porcelain stoneware tile floors, please refer to the article Tips for cleaning and maintaining ceramic tilesThe advice contained in this article is simply indicative and does not imply any responsibility on the part of Novoceram in any way. For the installation of your flooring, Novoceram recommends that you always use a true professional.